


TECEdrainprofile – assembly
Cut to length, insert, adjust - this is how niche-flush installation is achieved in no time at all.
A special feature of TECEdrainprofile is the stainless steel channel that can be cut to length and adapted exactly to the dimensions of the shower area. Different thicknesses of wall and floor coverings are also quickly taken into account thanks to possible fine adjustment in all horizontal and vertical directions. Another special feature: the factory-fitted Seal System sealing collar. It enables a watertight connection - simply by clicking it in.
Little helpers: The TECEdrainprofile wall and floor mounting brackets
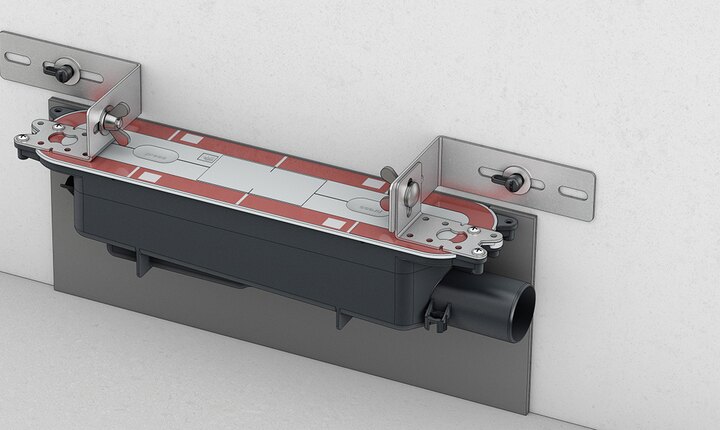
The TECEdrainprofile shower channel is made for niches and can be fitted flush. With the new mounting bracket, height alignment and position fixing to the wall and floor is quick and easy.
Plumbers and installers appreciate the TECEdrainprofile shower drainage system because of the clever product details that make installation easier and which can also be used to compensate for construction tolerances.
As a separately available accessory, the mounting bracket facilitates precise positioning and speeds up the construction process. The bracket can be used for both wall and floor installation. For wall mounting, it is dismantled after the screed has been laid and can be reused; for floor mounting, it remains in the screed.
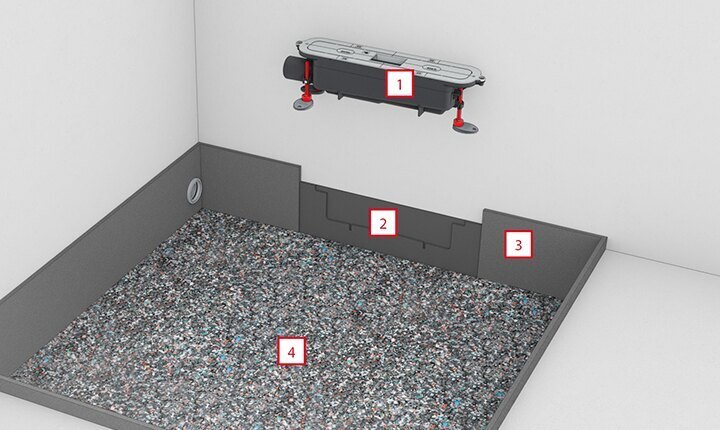
2 Sound insulation strips for TECEdrainprofile drain
3 Edge insulation strips for sound decoupling
4 Drainbase sound insulation mat for impact sound insulation
Step 1: Before inserting the drain, the shower area is professionally prepared by inserting the sound insulation strip, the edge insulation strip and a sound insulation mat.
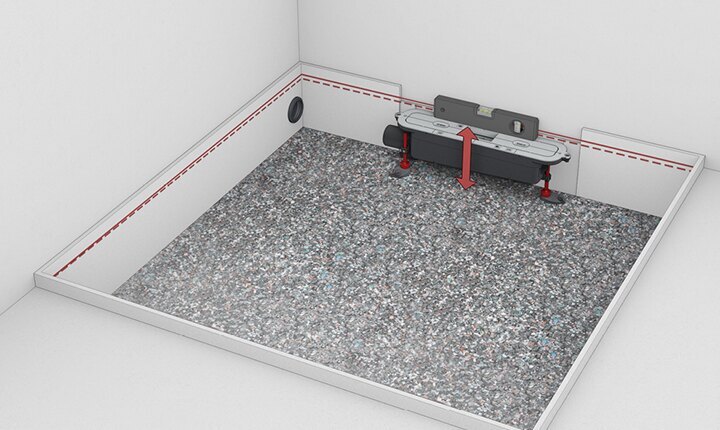
Step 2: The height adjustment of the drain is considerably simplified by the optionally available mounting feet.
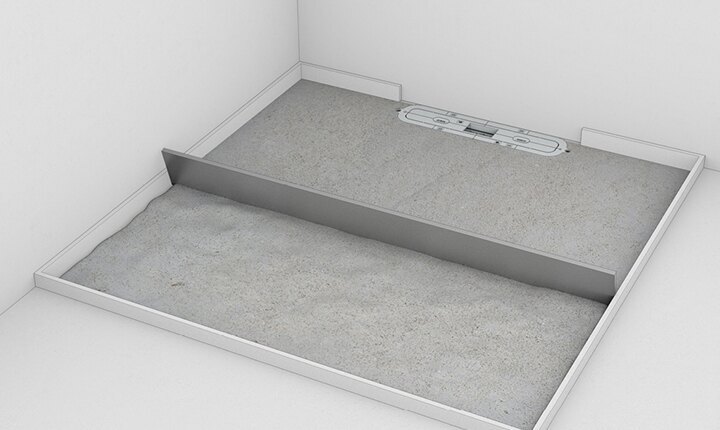
Step 3: The screed is laid with a slope of 1 to 2 % towards the wall. The factory-fixed shell construction protection protects the drain from damage and dirt.

Step 4: Once the screed has been laid, the first part of the shell protection is removed from the drain and the sealing sleeve supplied is inserted using a click mechanism. The shower area can now be sealed and tiled.

Step 5: The stainless steel channel is installed flush with the niche and can be cut to length on both sides if required. This means it can be adapted exactly to the width of the shower area.

Step 6: Even after the drain has been inserted into the screed, the shower channel can still be finely adjusted in all horizontal and vertical directions and can be adapted to different thicknesses of wall and floor coverings.

Step 7: Thanks to the "push function", the channel cover can also be removed by hand without tools for cleaning the drain when it is installed.

Step 8: The odour traps can also be easily removed for thorough cleaning of the shower channel.