


TECEdrainline-Evo – Assembly
Simple, fast and reliable.
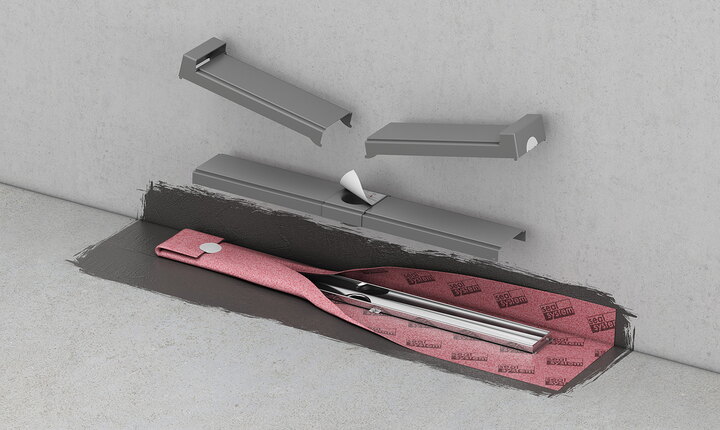
A special feature of the TECEdrainline-Evo channel is the three-part construction period protection cover. It simplifies installation and protects the fleece and channel from dirt and damage during the construction phase.
In addition, the shower channel has a factory-fitted Seal System sealing sleeve that only needs to be worked into the composite seal. This eliminates a time-consuming work step.
TECEdrainline-Evo levelling points
To simplify installation even further, TECE has developed plastic levelling points for clipping onto the foot supports of the shower channel.
By placing a tile rail on the levelling points, a wide screed take-off edge is created, which considerably simplifies the alignment of the shower channel and the precise work of the screed layer. Even without a tile rail, the levelling points are a help when aligning the shower channel as a support for the spirit level.
Installation close to the wall made easy
Until now, only assembly feet have been available for installation, but drilling the necessary holes close to the wall is not easy.
This is remedied by the new, additionally available wall bracket, which the TECEdrainline-Evo has ‘inherited’ from the TECEdrainprofile, with which the shower channel is fixed directly to the wall and perfectly aligned in height. This type of installation also makes it easier to underlay insulation material and allows floating installation.
Another advantage: once the screed has been laid, the wall mounting bracket can be removed and reused.

The assembly
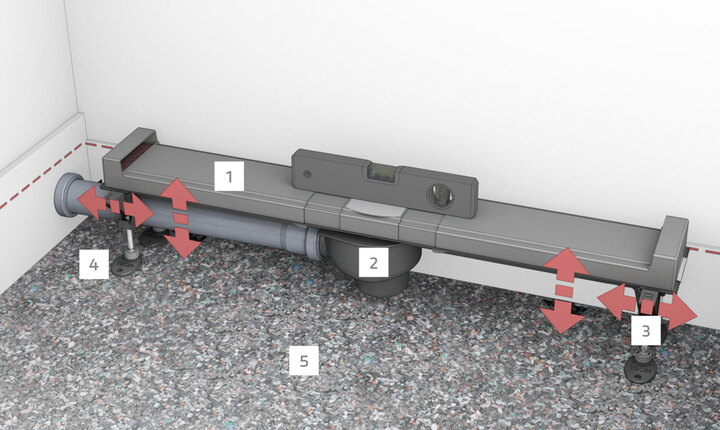
1 TECEdrainline-Evo shower channel
2 TECEdrainline drain
3 TECEdrainline assembly feet
4 Drainbase sound insulation mat
Step 1: The closed channel is placed and aligned in the room. This can be easily achieved with the optionally available mounting feet. The drain pipe can be laid under the gutter to save space.

Step 2: Leak test by the fitter: the dip rod is inserted into the opening of the transparent bare-wall protection.

Step 3: Water is poured into the opening. The construction time protection cover does not have to be removed or opened to do this.

Step 4: When handing over to the tiler, the undamaged seal of originality (1) guarantees the status of delivery of the channel from the factory.

Step 5: After filling with screed, the construction time protection is removed and the first layer of the composite seal is applied.

Step 6: The sealing sleeve is installed in the composite seal.

Step 7: Full application of the composite seal
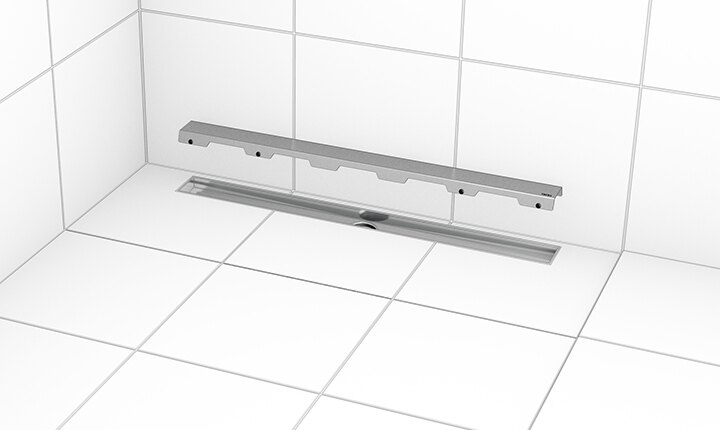
Step 8: After the tiling and grouting: Once the cover has been installed, assembly is complete. The cover can simply be removed for cleaning purposes at any time.