


Flush plate TECElux Mini - Installation
Flat, flatter, flush-mounted
Flush-mounted installation – get to it
The toilet flush plates TECElux Mini, TECEloop Glas, TECEsquare Glas, TECEnow and the urinal flush plate TECEfilo can be flush-mounted with the corresponding installation frame. Thanks to the simple modular system, the elegant flush actuation is quick and easy to mount on the wall.
Perfect design in form and function. Even in the profile. That’s why we’ve reduced the installation height of many of our flush plates to a minimum. Flush-mounted installation with special installation frame (which is an optional extra for many TECE flush plates) provides an even more seamless appearance – for the urinal too, of course.
Dry-wall construction
Dry-wall construction requires a TECE dry-wall module and the installation frame. Dry-wall modules of all installation heights can be combined with the flush-mounted installation frame.

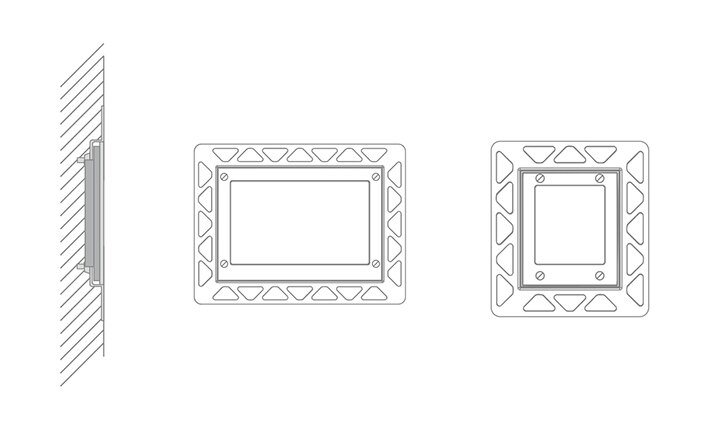
Step 1 (dry-wall construction): To recess the plasterboard for the cistern inspection opening, the installation frame is fitted onto the polystyrene bare-wall protection. The measurements of the internal installation frame are used to cut the plasterboard panel.
Brick-wall construction
For brick-wall construction, a TECEbox brick-wall module as well as larger bare-wall protection are required. Modules of all installation heights can be used in brick-wall construction too.

Step 1 (brick-wall construction): For flush-mounted assembly in brick-wall construction, the standard cistern bare-wall protection is exchanged for the brick-wall bare-wall protection system. After grouting on a suitable base (expanded metal, reinforcement fabrics or similar), the brick-wall bare-wall protection system can be disassembled again.

Step 2: After grouting (brick-wall construction) or attachment of the plasterboard panel (dry-wall construction), the respective bare-wall protection is removed.

Step 3: The installation frame including support frame is fixed to the grout or plasterboard panel using the factory fitted adhesive points.

Step 4: The depth of the installation frame can be set according to the tile thickness (5-18 mm). An additional upgrade set is available for heavier wall mounting (up to 33 mm).

Step 5: For tiling, the standard polystyrene bare-wall protection is placed on the installation frame. It can be removed again after tiling.