


TECEdrainline-Evo – Assembly
Simple, fast and reliable.
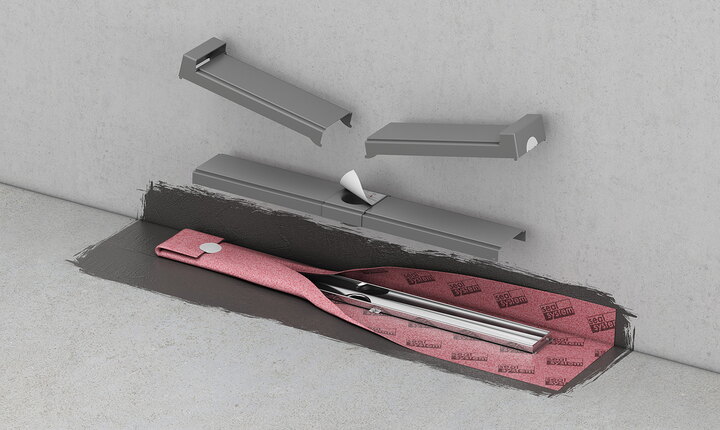
One feature of the TECEdrainline-Evo channel is the three-part build time protection cover. It simplifies the assembly and protects both the fleece and channel from dirt and damage during the construction phase.
Additionally, the channel comes with a factory fitted Seal System sealing sleeve that just needs to be incorporated into the composite seal. This saves a time-intensive working step.
The assembly
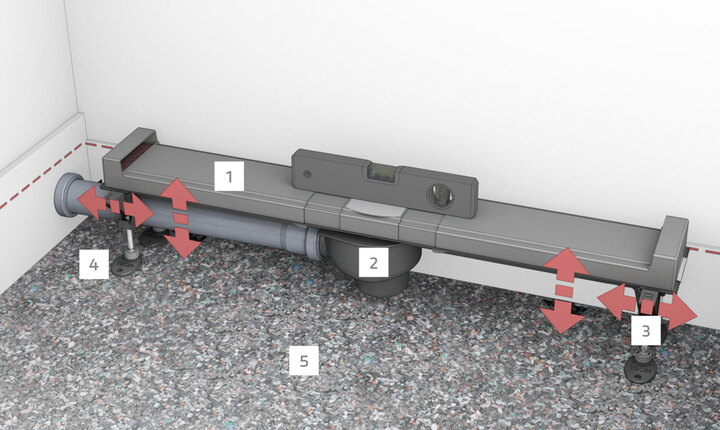
1 TECEdrainline-Evo shower channel
2 TECEdrainline drain
3 TECEdrainline assembly feet
4 Drainbase sound insulation mat
Step 1: The closed channel is positioned in the space and aligned. This is easily achieved using the optionally available assembly feet. The drain pipe can be laid space-saving under the channel.

Step 2: Leak test by the fitter: the dip rod is inserted into the opening of the transparent bare-wall protection.

Step 3: Water is poured into the opening. The build time protection cover does not have to be removed or opened to do this.

Step 4: When handing over to the tiler, the undamaged seal of originality (1) guarantees the status of delivery of the channel from the factory.

Step 5: After filling with screed, the build time protection is removed and the first layer of the composite seal is applied.

Step 6: The sealing sleeve is installed in the composite seal.

Step 7: Full application of the composite seal
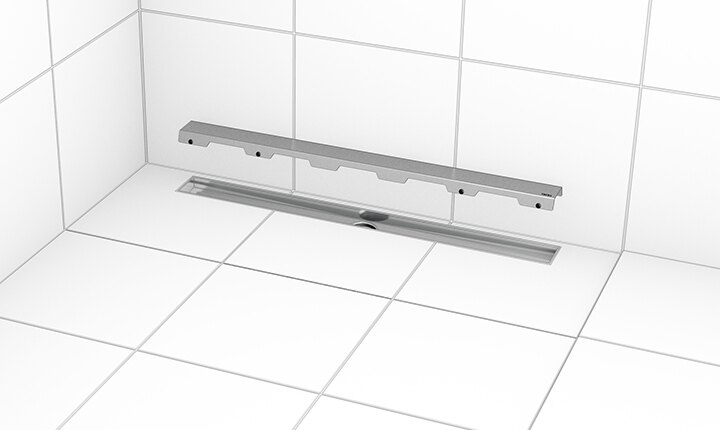
Step 8: After the tiling and grouting: Once the cover has been installed, assembly is complete. The cover can simply be removed for cleaning purposes at any time.